Nuffnang Ads

Showing posts with label dough. Show all posts

Tuesday, October 22, 2013

Freshly Made Pasta

I have always dreamed of making my own pasta as those who have tried it swears by it and never did turn back into buying them off the shelves. I never knew how easy it was to make until trying it myself.

All you need is just two ingredients to make pasta- flour and eggs. How easy is that? The only troublesome part is the kneading and rolling but hey, its worth it when the noodles has so much texture after cooking. In local terms, it is very QQ! (meaning great texture with bounce)

Ingredients (for 3 adults)
- 2 cups of all-purpose flour/ plain flour
- 3 eggs

Basically, my rule of thumb is that the number of eggs will state the number of people you are to cook for. And its about 3/4 to 1 cup of flour per person. Some recipes state 1/2 cup for one person but I found it the dough still too wet and so I increase the amount.

Steps
1) Place the flour on a big working surface or big deep bowl

2) Make a well and place the eggs inside. You can add a few drops of olive oil and 1/2 teaspoon of salt if you want too. Its optional.


3) Take a fork and beat the eggs. Then slowly, mix with the flour bit by bit..


4) Then, after mixing it, put on a working surface to knead it until its smooth and soft. If you are not sure if its good, you take a paring knife and slice through, if you still see air bubbles, you continue kneading. It should look like the below picture after cutting through- smooth and no air bubbles.


5) Then you use a cling wrap and wrap it up for about 30 mins


6) After that, divide the dough and roll it out in individual portions. So if you have 4 people eating, you divide the dough into 4 pieces. As you cut out the first piece, you leave the rest of the dough wrapped if not the dough will harden up.

7) Keep your working table and dough well-floured. You flatten the dough with your hands and put it through the pasta maker. If you don't have one, don't fret. You are just one of all traditional Italian housewives who believe in everything by hand. You just need a rolling pin to roll it till its very thin and smooth. It should be very translucent. The picture below is still not good enough.


8) After that, you either use your machine or roll it up and cut by hand to the kind of noodles you want. As you can see, your children will enjoy making this as to them, its like playing with play dough.


9) Keep flouring your noodles so that it wont stick. I made different kinds of noodles to try it out. Finally, put your noodles in a pot of salted boiling water for only about 2-3 mins. Homemade pasta cooks much faster. So test it first before taking it out of the boiling water.


After making my own pasta twice, I concluded that the noodles I like best is still the thinnest one (picture below). From both attempts after making, and trying to make the dough as thin as possible, the top Fettuccini ones turned out still too thick for my liking.


Made beef bolognaise sauce topped with grated parmesan cheese and bacon


Have fun!!

Tuesday, September 3, 2013

Sourdough sandwich with maple glazed pork belly

Recently I have been fulfilling my dream in making my own bread, without getting a bread machine. I insisted on not buying one as a bread machine is huge and it takes up so much space.

Since my last post on baking plain white bread, I decided to do the lazy way by just making sourdough from the premix. And what's best about this is that, it does not require any kneading. So its so simple and effortless!

I got this from Cold Storage Supermarket.


Just follow the simple instructions in the box and voila! There's even instant yeast provided in the box. So all you need is just warm water.


I was very happy with the results as its nicely crisp on the outside and soft on the inside. Great for sandwiches!


I cut it up and placed them in the fridge for the next day's breakfast.

The next morning, I took out slices of pork belly in my fridge which was leftovers from steamboat last night. So it was perfect.


I just grilled this and brushed over some maple syrup on it at the very last few mins before it is done.

Finally, I put on top of my sourdough and let it melt together with my shredded cheddar cheese by popping the bread into the oven together with the maple-glazed pork belly and cheddar cheese on top to let the cheese melt and to just heat up the sourdough.

After the cheese is melted, remove them from the oven and put some iceberg lettuce in it!

Very simple!

You have the sour-ness from the bread, sweetness from the maple syrup in the pork belly, the saltiness from the cheddar cheese and the crunchiness from the iceberg lettuce!

Perfect meal for breakfast or lunch!


Monday, August 26, 2013

Curry Puff

This has been one of my favourite snacks since young. But it has been growing increasingly expensive- from 40 cents to the present, $1.50.

Anyway, thank God my helper makes quite good curry puff and so it was a great opportunity learning from her so that in future, I can make for myself or even for parties. Definitely useful to learn!

Ingredients (for making 15)

4 potatoes
3 big red onions
7 shallots
curry leaves
3 packets of chicken thighs (can use breasts too or mixture)
5 eggs
Planta margarine
rice flour
plain flour
sugar
salt
water
meat curry powder

As you can see, the ingredients are quite straight forward and easy to get. If you cant find curry leaves, it is ok. Its just to make the filling more fragrant. And also if you are abroad and do not have the specific Planta brand margarine, it is also ok. Don't kick yourself or skip this recipe just because you cannot get those 2 items. As for the rest, I am confident you can get it!

Steps
1) Skin the potatoes and dice them. Then, put them in boiling water to cook. Drain them out after its cook

2) Then dice the shallots and big red onions


3) Put the chicken thighs in boiling water to cook them before dicing them up


4) Boil the eggs till they are hard boil. Then you cut them up in quarters, lengthwise.


5) Then pluck out the curry leaves and wash them.


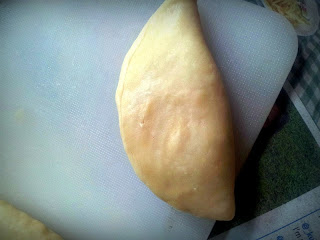
Now, the tricky part is the dough. There are basically two layers of dough in curry puffs- the water dough and the oil dough.

6) Water dough - put 200g plain flour into a mixing bowl, together with 1 egg, 60ml of water, 1TB of rice flour and 1 tsp of salt. Mix and knead till its like that.


7) Oil dough- put 100g plain flour, 85g of planta margarine, 1 TB of rice flour, 1 tsp of salt. Mix and knead.


8) Then weight the water dough and roughly divide the weight to 15 portions so that you can cut it up and distribute evenly. Do the same for the oil dough and divide them into 15 equal portions. I used the weighing machine to be exact.

This will turn out to be a huge curry puff. If you prefer smaller size ones, then I suggest when splitting up the dough into equal portions, you can maybe divide them into 20-25 equal portions instead of 15.


9) Then take one water dough and flatten it with your hand, then put the oil dough in it.


10) Wrap the water dough over the oil dough before flattening both down.


11) Then use a rolling pin to flatten and roll it horizontally and vertically.Then just make it like a ball and put aside. Do for all 15 of them by placing the oil dough inside the water dough.

12) To cook the ingredients, have all this stand by

Diced onions, shallots, potatoes, chicken, curry leaves

13) With a little bit of oil in the frying pan, add the shallots first. Fry till its fragrant and then put in the red onions. Do it step by step.


14) After both shallots and onions are translucent, throw in the diced chicken and potatoes


15) Stir and mix it up before adding the curry powder. For the curry powder, put 1 TB of curry powder in a bowl first with a little water to dissolve the powder before pouring into the frying pan with the ingredients.


16) Add curry leaves, salt, sugar, white pepper to taste after stirring and mixing. If the colour looks too pale and you like spice, then add one more TB of curry powder. If you find that the potatoes is still quite sturdy looking, add a little water to the pan so that the potatoes can go mushy. Cook till the water/gravy has been absorbed by the ingredients.
potatoes still in blocks-straight edges

That is what you want to attain- mushiness with no gravy.

potatoes gone soft and edges are rounded and outcome is mushy


17) Once turned mushy, off the stove and leave it to cool for about 15 mins.

18) Then get ready to start wrapping


19) First roll the dough to a rough circle.  then place the egg and the ingredients on top before wrapping.


20) Then you just wrap them up. Twirl and pinch at the sides to seal. Do this for all your doughs.


21) I cut up plastic bags to wrap my curry puffs as I only wanted to fry these curry puffs the next day. So for storage, I wrap the curry puffs in plastic and put in the freezer.


22) The next day, when I open it up, it will look like this


23) To fry, I used peanut oil. Make sure when frying, the oil is enough to cover the curry puffs.

24) Fry till its golden brown


You can vary this recipe with whatever ingredients you like. Other variation can be sardines. You can just get the canned sardines and fry with shallots and onions. Main thing is to make the ingredients like a paste with no gravy so that it will not soak through the dough.

Enjoy this delicious snack! 

Monday, August 19, 2013

Basic Pizza Dough Recipe

I have had numerous pizza dough recipes in my file and after reading so many of them and being so confused as to which one I should follow, I decided to take a bit of everything and construct my own which eventually tasted really good and crispy! *Phew

The following recipe will be to make 2 medium size pizzas- enough for a family of 4 adults

Ingredients:
- 3 cups of bread flour
- 1 cup of warm water
- 2 tsp of dried yeast
- 2 tsp of salt
- 3 tsp of olive oil
- dried oregano (optional)

Steps:
1) Place flour, yeast and salt in bowl and mix
2) Gradually add warm water and olive oil. Knead by hand for about 10 mins until the dough is smooth. Great activity for the children to help out and have some fun in the kitchen.


3) Place dough in lightly oiled bowl, cover with cling wrap or kitchen towel. Set in warm place. I placed mine in the oven. Let it rest for 1 hour.

4) After an hour, I sprinkled some plain flour on the working surface to knead the dough. Do it gently and divide them into 2 to get 2 medium pizzas.

That's it! Not difficult at all!

What I love about pizza making is that it is fun especially when dressing up your pizza to whatever ingredients you like. This is what I had.. white button mushrooms, ham, mussels, green bell peppers, onions, prawns, squid, garlic and tomato paste


For my son, he added tomato paste, garlic herb butter mushrooms, ham and cheese. This was his pizza!


My daughter simply preferred only tomato paste, ham and cheese...and cheese and more cheese!


The pizza came out to be crispy which was very enjoyable with the melted cheese!

As for the adult's pizza, I made one 2-way pizza which was garlic herbed butter mushrooms with raw garlic and lots of cheese on one side and the other side, I added tomato paste, onions, green bell peppers, ham first into the oven for a while. Then at a later part, I cracked in the egg and spread the cheese over. I was afraid to overcook the egg that's why. I always enjoy ham and egg pizza as its very refreshing and light. Would recommend you making that for breakfast!


The other pizza, I made seafood marinara which was basically, tomato paste, with mussels, squid, prawns, onions, raw chopped garlic and sprinkled dried oregano over it.


This turned out very tasty and expensive-looking as I love seafood especially when the mussels and prawns is presented as a whole and not all chopped up. Thee only criticism about this dish is that the pizza was a bit soggy due to the moisture from the seafood. So I would have left it longer in the oven to dry out a little bit more before serving

Overall, the pizzas turned out better than I expected. I would definitely not order pizza delivery ever, since this taste so much better and it's also cheaper! I would also think of doing this for a party! But remember to cook this and serve it when its straight from the oven- hot and crispy with the melted cheese!

I also grilled chicken wings for dinner. So, you can imagine how full we were after dinner!